HOW TO PLAY
An AdapTee Golfer makes all shot-related decisions while playing hands-free golf, and their caddie (friend, family member, caregiver, or volunteer) carries out each precise instruction through their physical movement and use of equipment.
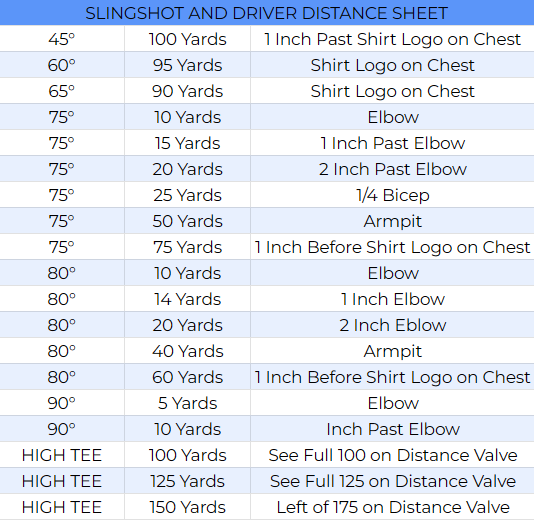
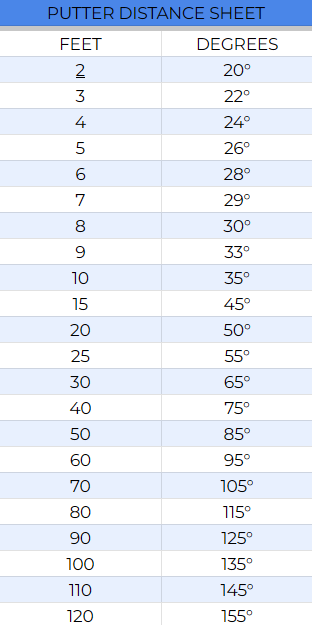
AdapTee Golf is played using three pieces of equipment to advance the ball from tee to green: a swingless POWER2GOLF driver, a slingshot, and a Pendulum Putter. All equipment has guidance for how to achieve desired distances on distance sheets posted below in the approach and putter sections.
SELECTING YOUR TEE
When hitting a drive you may use any length tee. Approach shots may be hit with any length tee unless your ball is in a fairway bunker or the rough. When in the rough, or a fairway bunker, players may choose not to use a tee or to use a short tee no longer than 1.5 inches long.
THE DRIVE
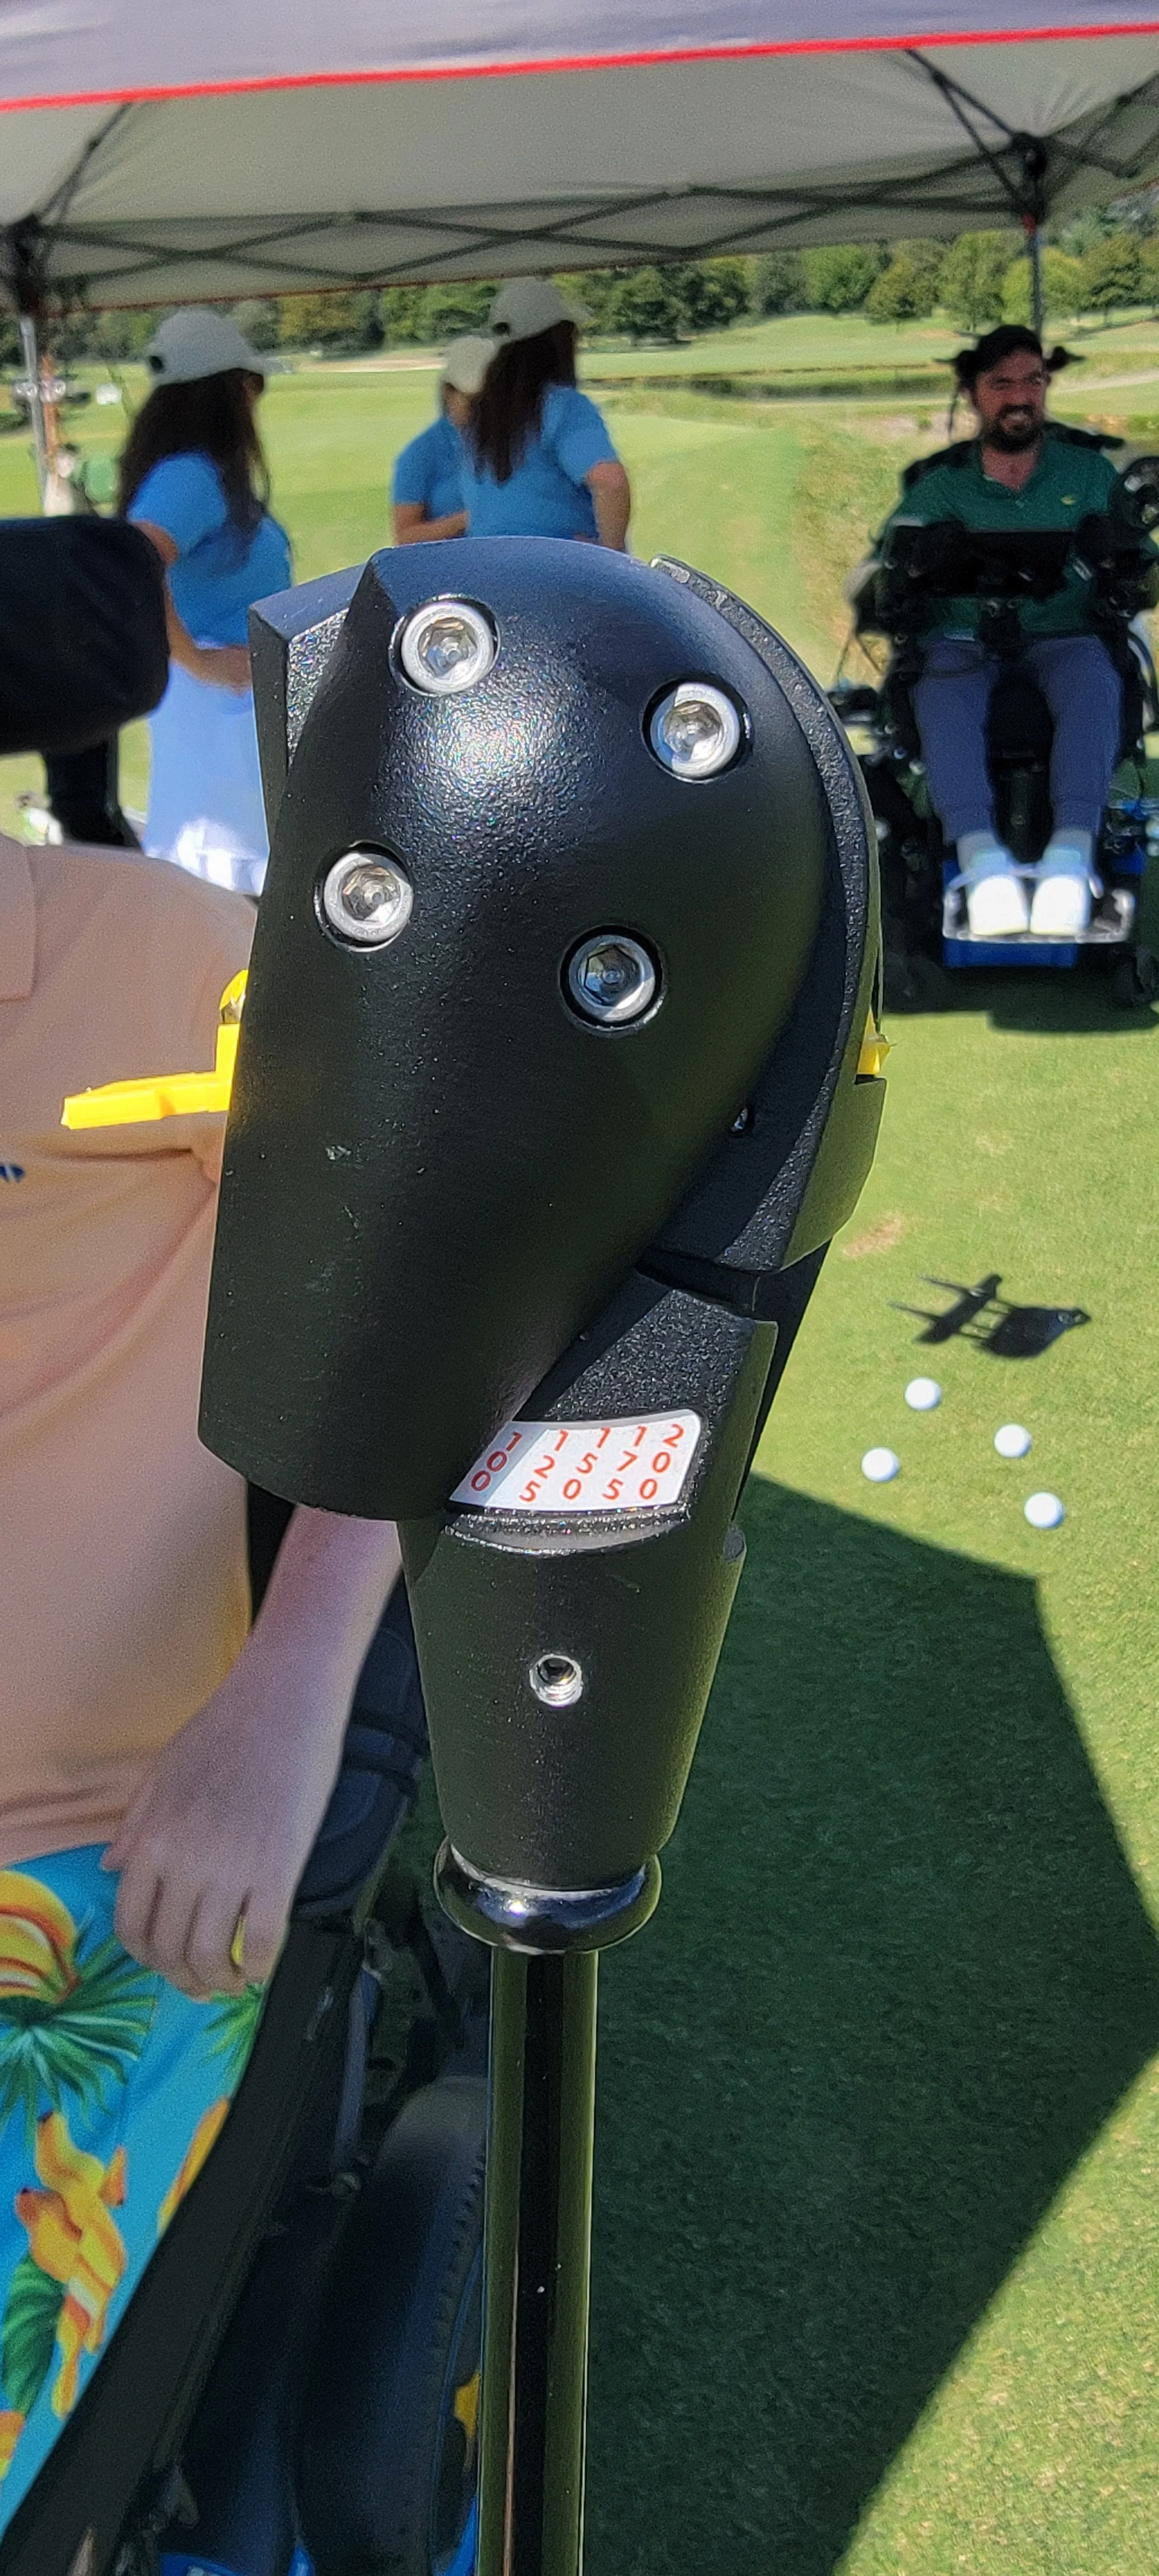
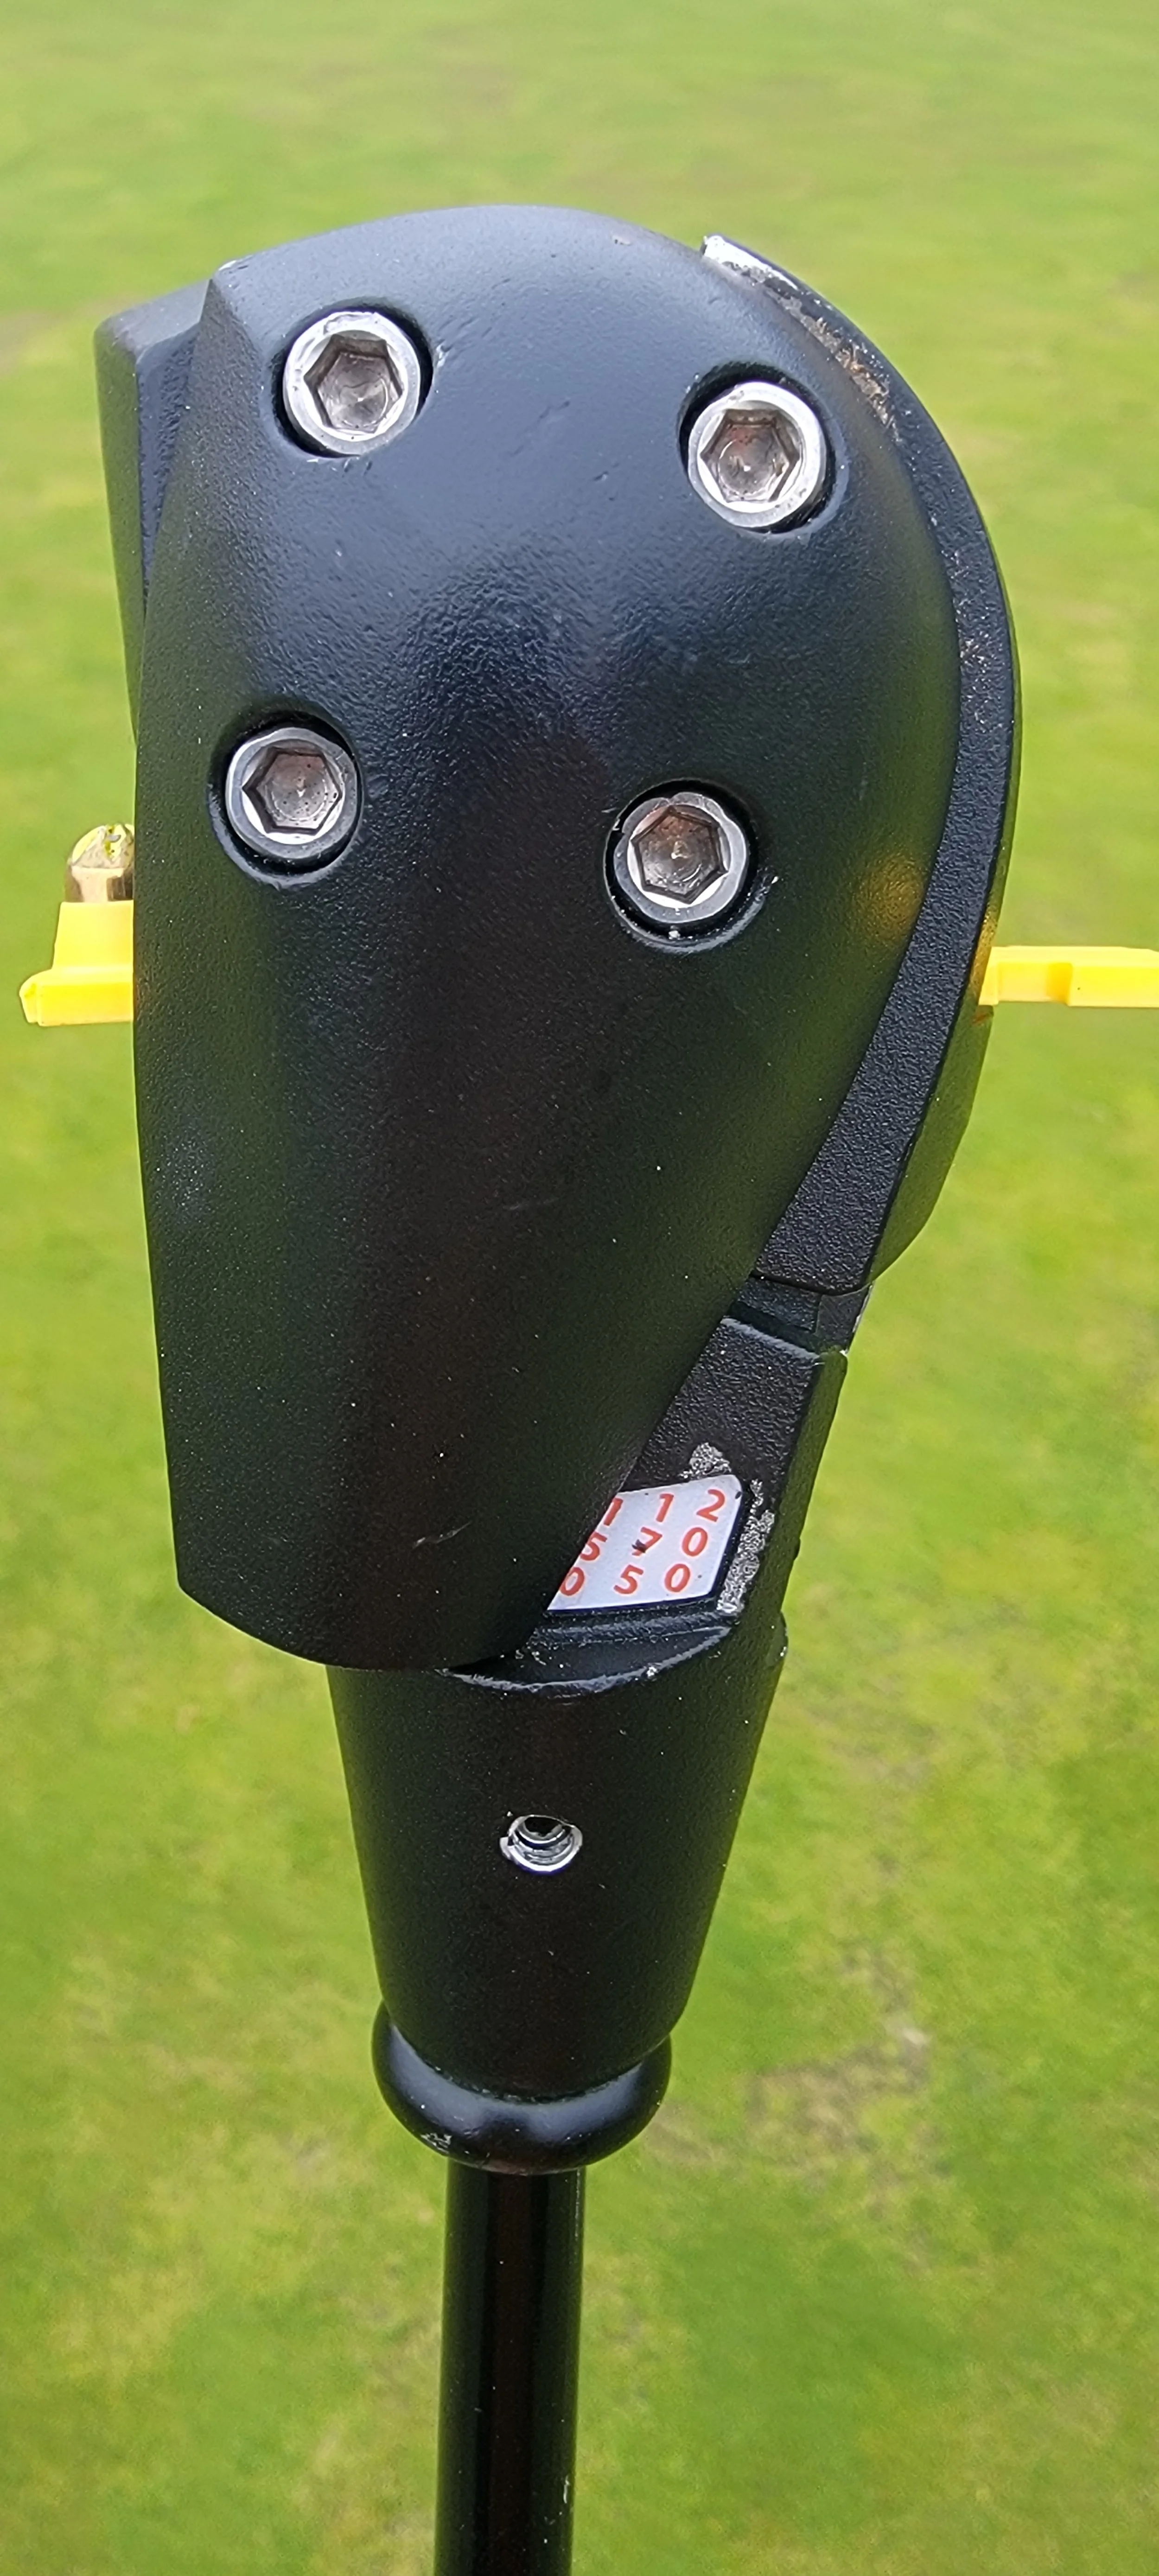
To load a charge into the club instruct your caddie to pull back on the top portion of the handle of the swingless club until you hear a click. Your caddie will then open the chamber and see a recess in which they can slide one charge. Once in place, the charge strip will look like the center picture to the left. Your caddie will then press down on the gray firing mechanism that has swung out to the right, and then close the chamber such that it looks like the final image on the right
THE APPROACH
This can be completed using either the swingless club (recommended for shots between 75 and 220 yards from your target) or your slingshot (recommended for 0-120 yards from your target). If you’ve chosen to use a swingless club, refer to the above section (THE DRIVE) to guide your caddie. Instruct your caddie to place a ball on your tee of choice. High tees are best for shots that require your ball to stop when it lands, shorter tees are best for shots that can take advantage of extra roll after landing. It is up to the player to instruct their caddy how the tee needs to be to set up their next shot. Players may also choose not to use a tee should conditions make this the optimal decision.
On the bottom of your distance sheet (marked HIGH TEE) will be a few options to explore in terms of what power you will instruct your caddie to set your swingless club to.
This is done by instructing your caddie to move the power dial on the back of the swingless club such that it covers half the number representing the distance you would like to hit your shot. To the left is a picture of the swingless club loaded while set to hit the ball 150 yards. To develop a strong sense of how to set the power dial, it is recommended to spend some time at your preferred driving range to practice each shot distance.
Position yourself at your course’s forwardmost available tees. Instruct your caddie to place your ball on your tee so that the ball is between an eighth and a quarter of an inch off the ground. Instruct your caddie to place the swingless clubhead so that the POWER2GOLF lettering lines up behind the ball toward your target and the club head is a half inch from the ball. To the right is roughly how far the club head should be positioned from the ball.
You will then instruct your caddie using four different types of movements to align the club to hit your drive. Once your caddie has the club in the position for your shot you will say release. Your caddie will then pull back on the top button with their left thumb, and press down on the firing button with their right thumb.
The four movements to direct your caddie are as follows:
Closer/further away - Your caddie will slide the club closer or further away from their body.
Left/right - Your caddie will swivel the club face to the left or right.
Face up/down - Your caddie will rock the head of the club to tilt the club face up or down to generate a higher or lower launch angle.
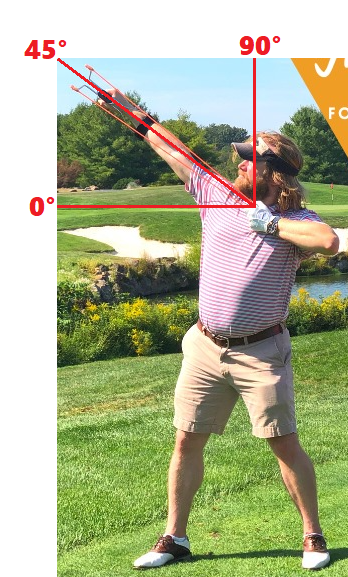
Hands down/up - Your caddie will raise or lower their hands bringing the club’s grip up or down. This will shift the alignment of the lines on the face of the piston such that they are:
Parallel to the ground creating a straight ball flight
Leaning away from the caddie (hands up) creating a ball flight to the right, away from the caddie (a fade)
Leaning towards the caddie (hands down) creating a ball flight to the left, towards the caddie (a draw)
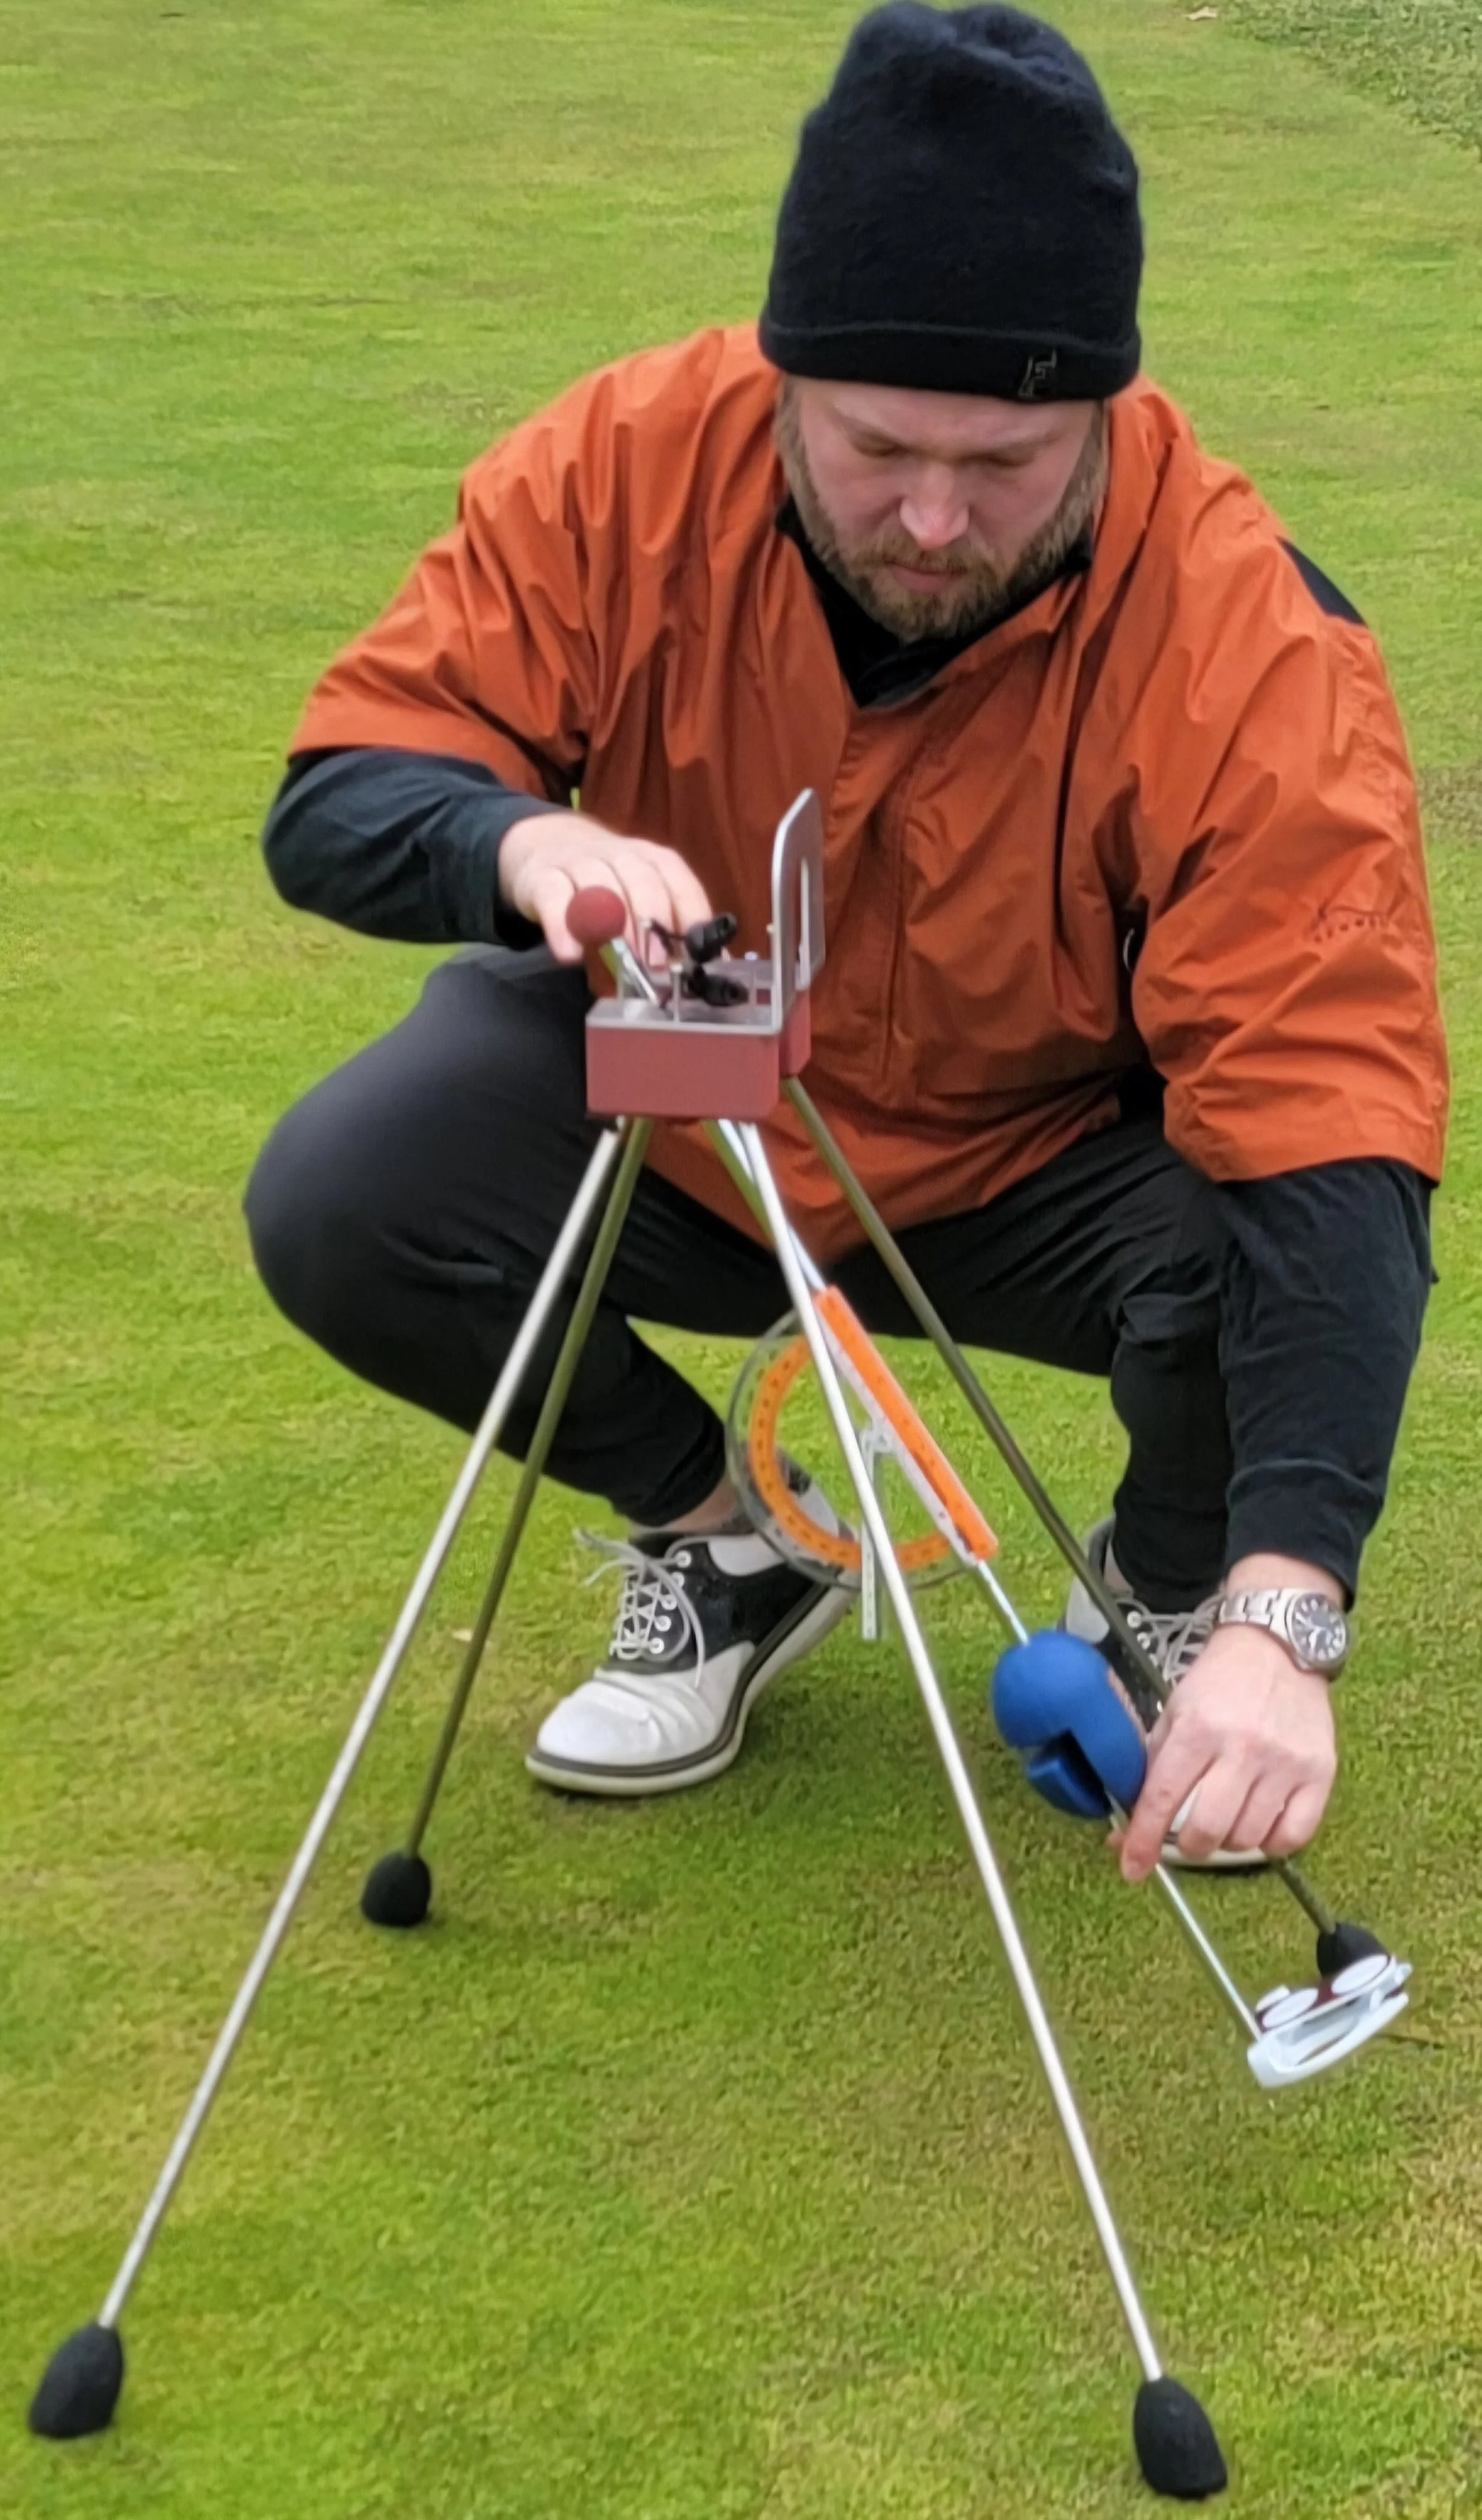
THE PENDULUM PUTTER


